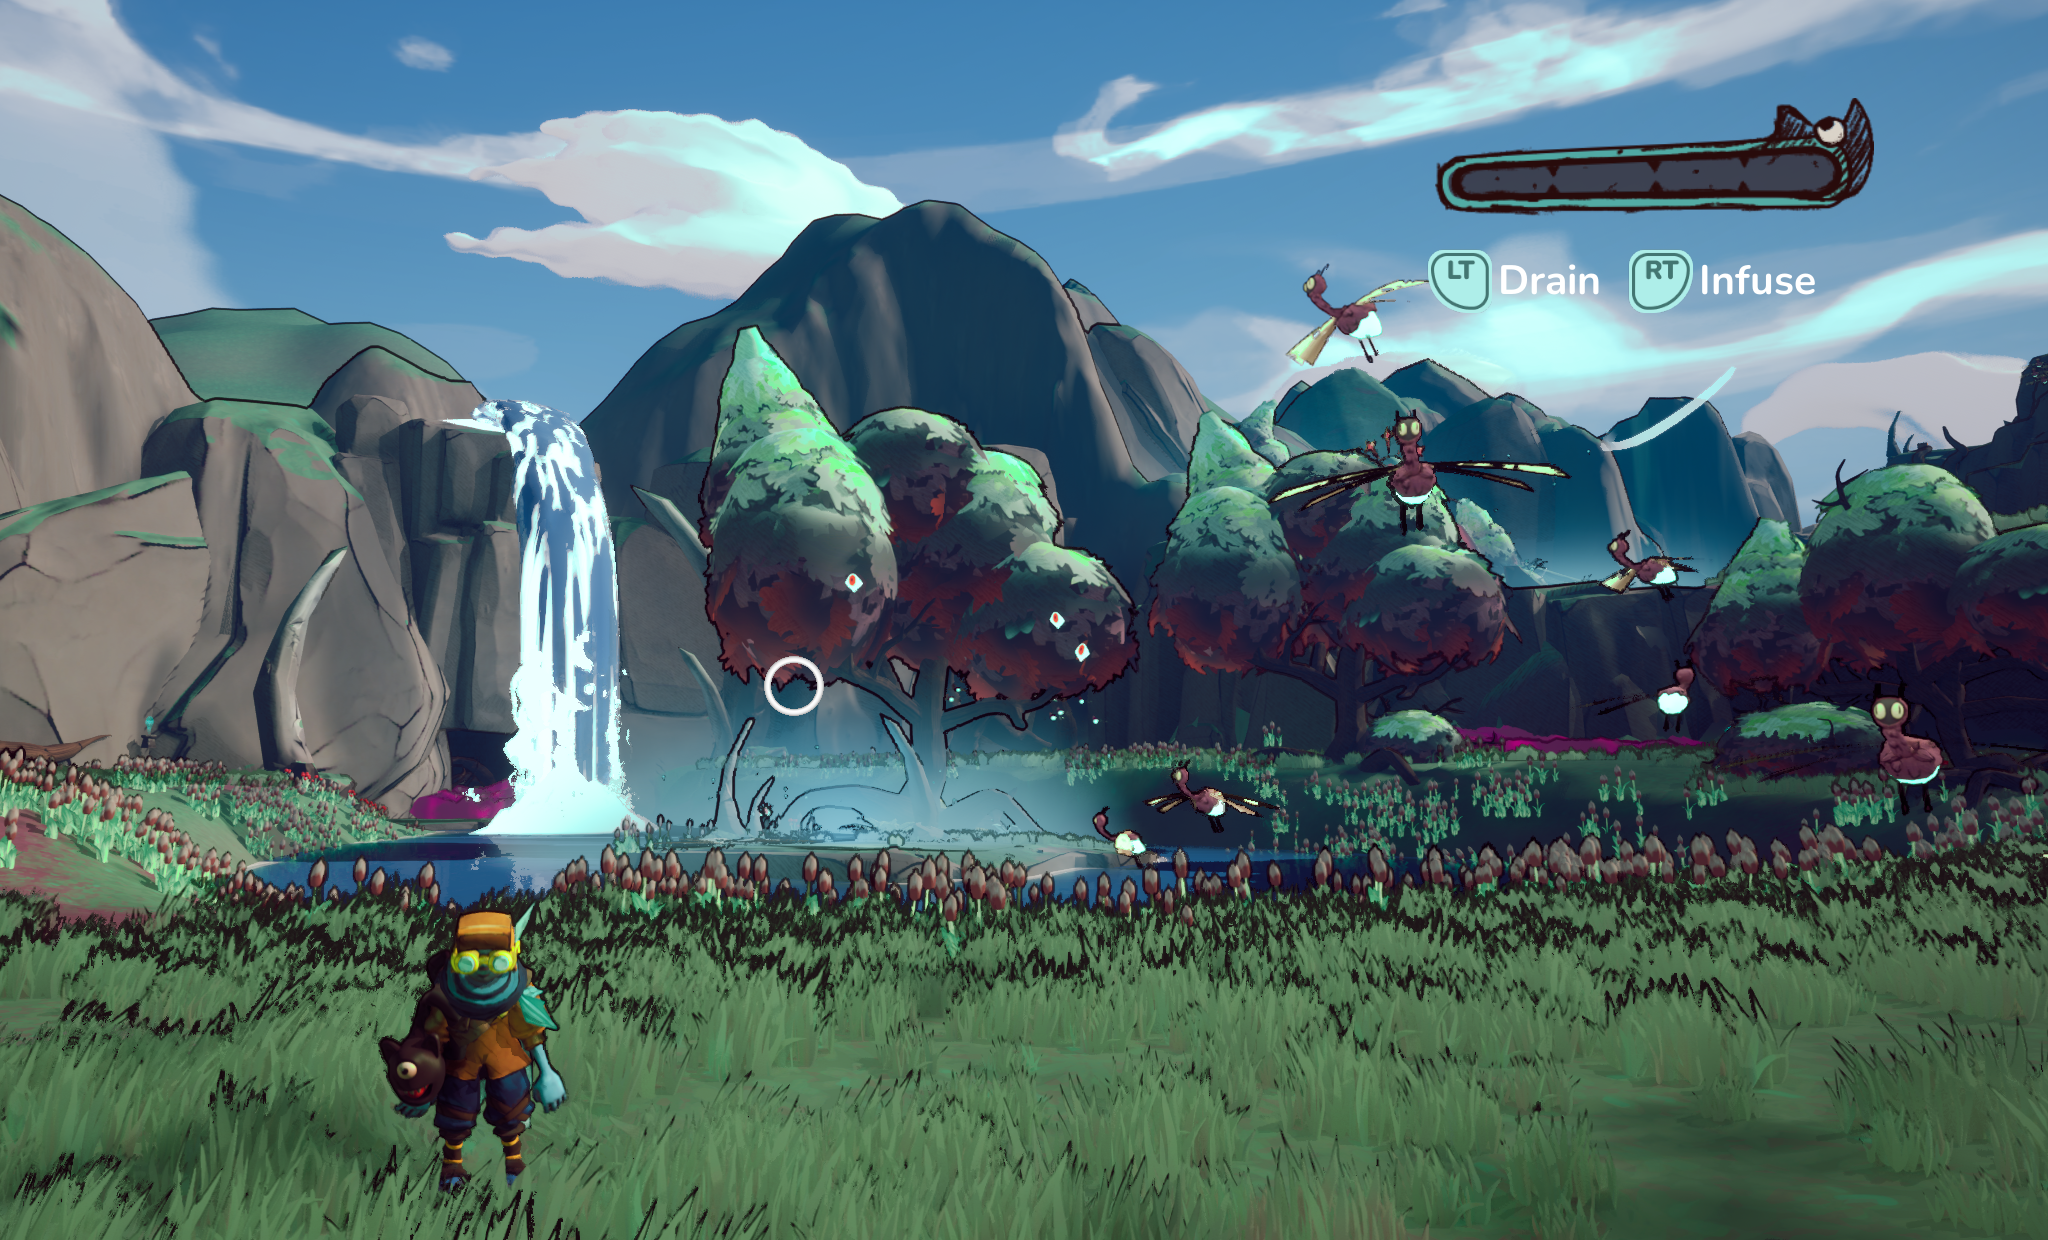
Alazia is an action-adventure game where the player needs to drain and redistribute vital energy from living creatures and plants to solve puzzles. The player also needs to collect other resources and craft to progress. It is a light-hearted adventure game inspired by cosy games, but with a twist: the dissonance between comfort and uneasiness.
Players will be rewarded by exploring and using the environment and showing ingenuity to solve puzzles and finish quests. The universe is relaxing and lenient, with a few tense, harder challenges.
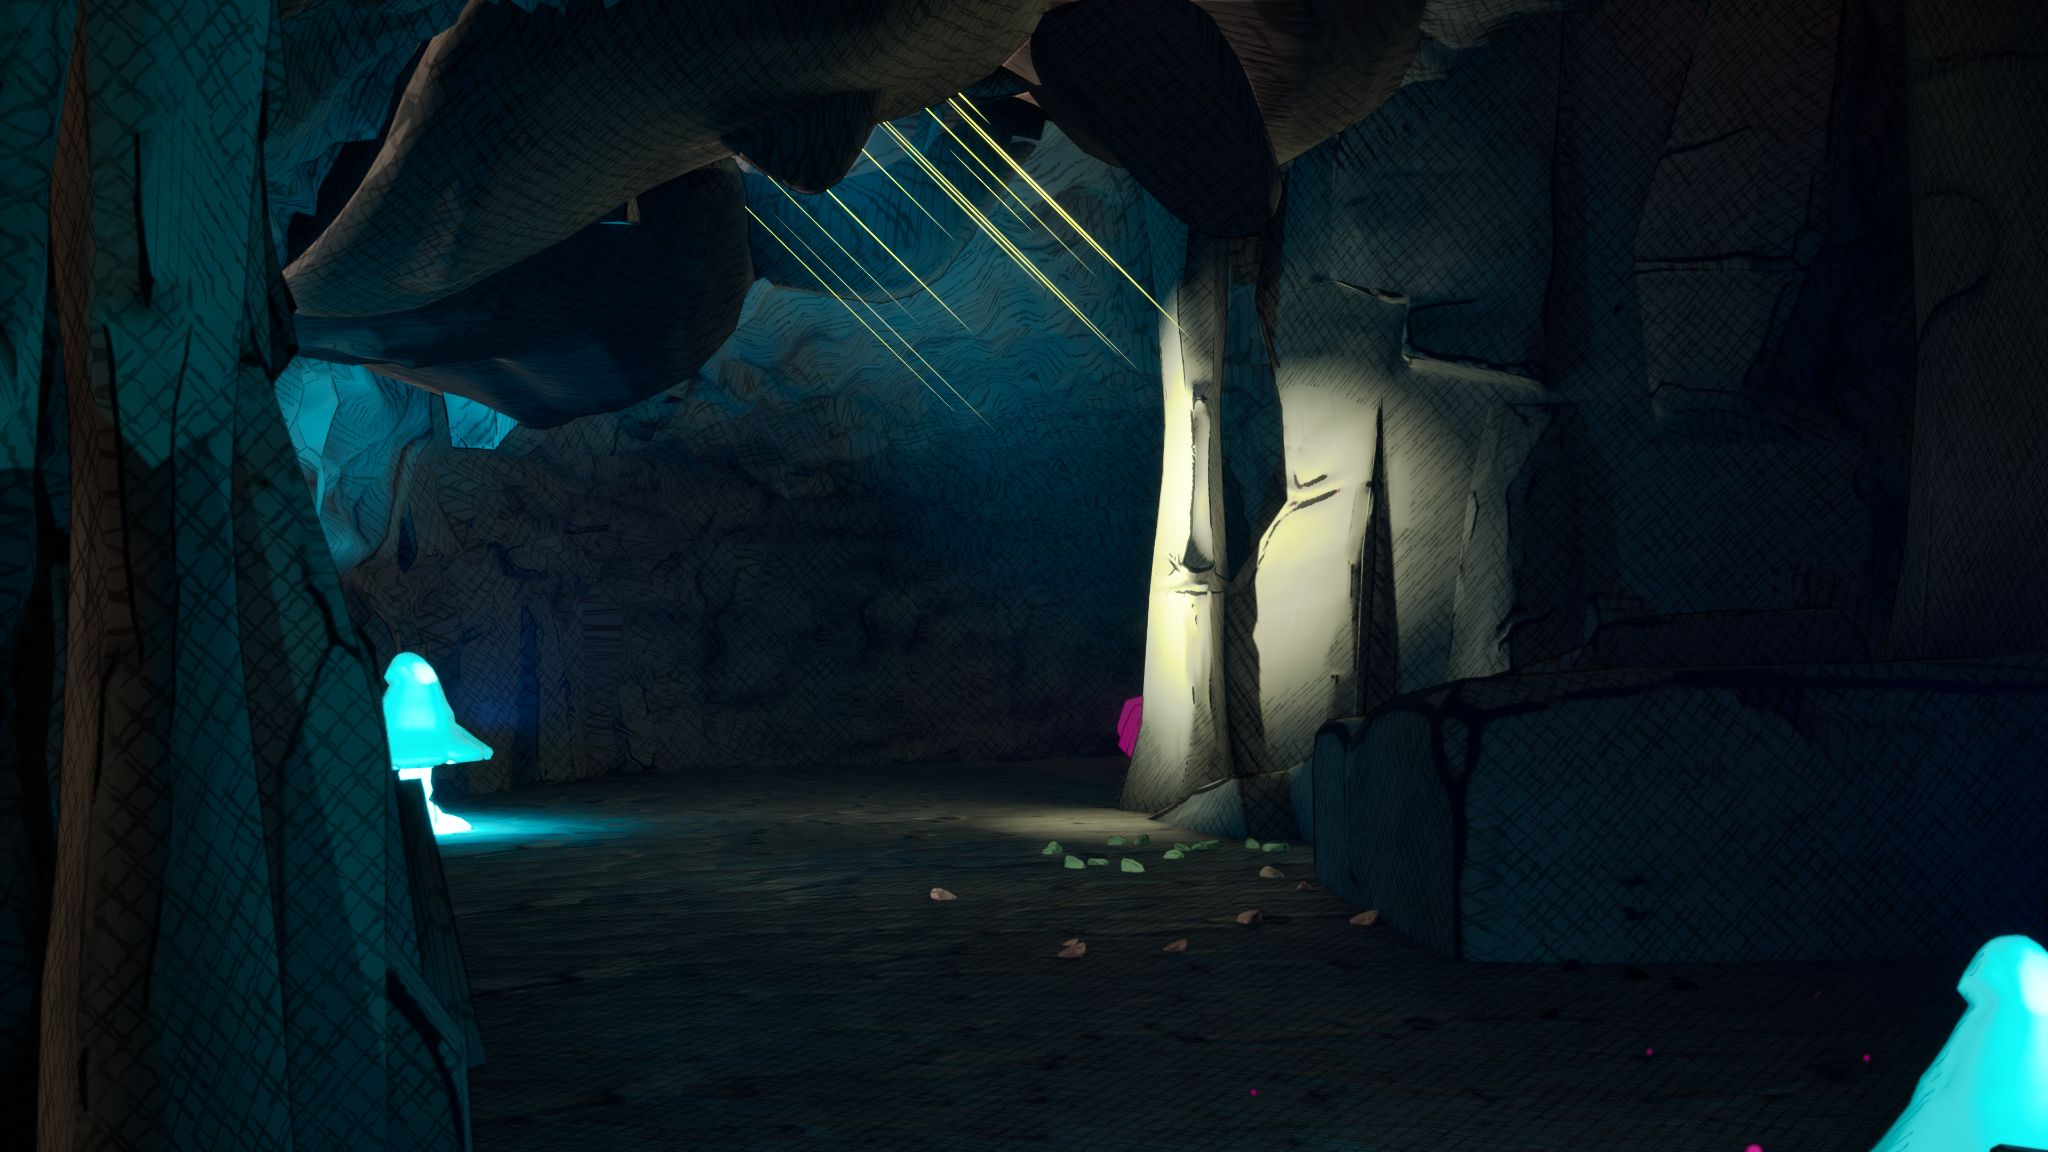
Alazia’s aesthetic is highly stylized with a good-looking environment that may surprise the player.
Controls#
The game is made to be played with a controller; using a keyboard and mouse you may be unable to reach the end of the game.
Lore#
You play as Kenops, an apprentice guardian determined to accomplish his mission: find all the fragments of the broken heart that once powered Alazia in order to save his world. But this mission comes at a price - in order to find all these fragments scattered across the various celestial islands, he will have to kill the creatures that inhabit them. His role of guardian is called into question when his actions blur the line between protection and destruction.
In the final version, the game features two playable islands: a starting island, which serves as a tutorial, and the main island, called Wind Haven. In the narrative, the world of Alazia has four islands, each with their own artefacts, caves, and heart pieces to save, but this had to be cut due to a lack of time.
Screenshots#

Background#
This game has been developed as part of my master’s in video game development, as a team of nine students. Objective was to develop a game for the purposes of shipping it, as a real game studio would.
Personal contributions#
Because our team was large, I wanted to list my personal contributions to the project and some details around them, especially the features I programmed.
Programming#
Dialogue System#
The Dialogue System was developed so designers can create dialogue as tree structures, featuring conditions and player choices. It also allows you to trigger custom events. Dialogue conditions are linked to a fact system. The system is split into two parts:
- Editor: gives designers the freedom to easily create and edit dialogue without programmers help
- Runtime: managing the display of dialogue, lifetime, condition checking, choices management, …
The end goal of this system was to offer designers some form of freedom in creating the game flow without programmers intervention.
Editor#
- Dialogues are created and stored in a special asset called DataAsset
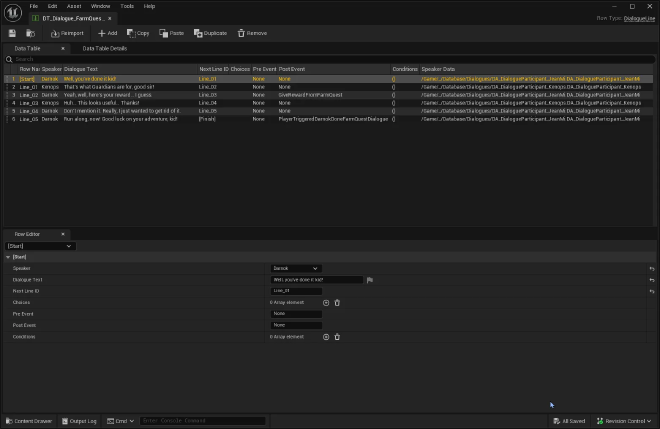
Dialogue Edition in a DataTable - A designer can create conditions. Conditions are separated with an “AND” logical operator.
- A game designer can create dialogue branches and ask for a choice from the player.
- Multiple dialogues can be attached to one NPC; the started dialogue depends on a chosen condition, decided by the game designer.
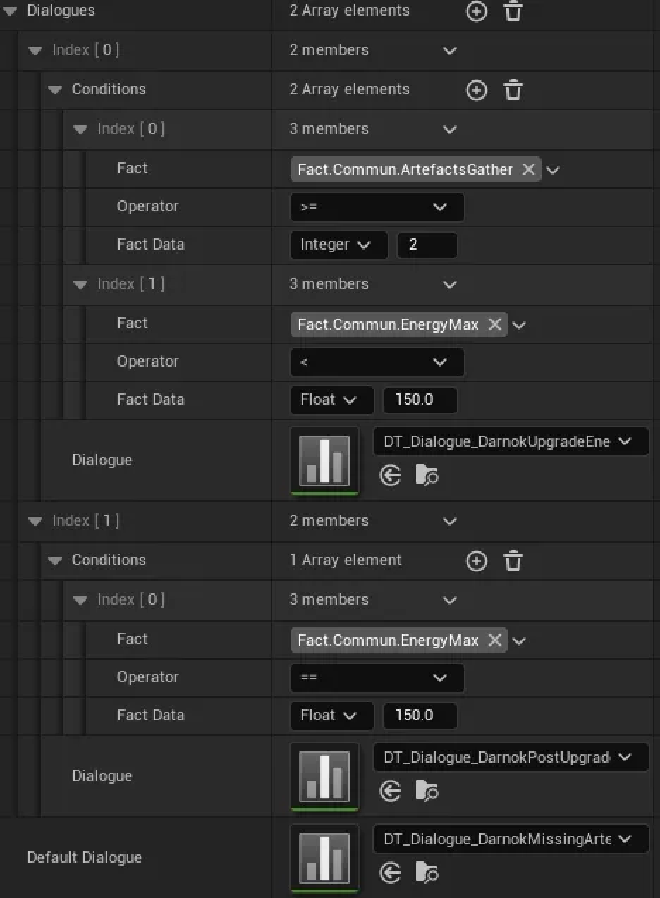
Dialogue conditions
Designing dialogues in the Unreal Engine editor using DataTable assets is not the most practical. The UI/UX of DataTables makes editing or creating dialogues quite cumbersome, and it is difficult to modify them without modifying Unreal’s highly integrated systems.
Furthermore, the people responsible for narration in the project did not necessarily have a laptop powerful enough to run Unreal Engine and were mainly working outside the engine.
As a result, the system supports the creation of dialogue in Microsoft Excel, which can then be exported to CSV format and imported directly into the engine.
In hindsight, I should not have focused on the Excel tool, as it took me a long time to develop. The narrative designers did not have the opportunity to use it due to a lack of time to implement the narrative. Still, the system can serve as a base for other teams or future projects, and is usable.
Creating an Office add-on basically involves creating a web application that is integrated into Excel. The advantage was that it worked on both the desktop and web versions of Microsoft Office. The add-on was developed with TypeScript.
Runtime#
At runtime, the system is capable of detecting any errors made while designing the dialogue. An error or warning message is displayed, depending on the severity. The majority of cases are handled, allowing the designer to easily test their dialogue and be aware of any errors.
Targeting System#
The targeting system underwent several modifications throughout the project until a version was found that worked properly. The biggest changes are listed here, but many iterations were made.
Overall, common to all versions:
- The targeting system is a component attached to the player’s Blueprint.
- Targetable elements have an ActorComponent that manages the logic common to targetable elements (related to the energy drainage/injection system).
- A targeting reticle changes dynamically depending on whether the player is targeting something or not.
Version 0#
The initial version of the system was entirely made in Blueprint. However, the algorithm, which consisted of selecting targets, filtering them, and then sorting them, made reading the Blueprint quite complicated.
Algorithm
- At each frame, we find every Targetable elements around the player
- We filter each targets, taking only those that are in front of the player character
- The targets are then filtered again, and only those that are visible on the screen (and therefore not behind a wall) can be selected.
- The targets are sorted by distance from the centre of the player’s camera, and the target closest to this point is selected.
This version had many problems. The algorithm performed complex calculations simply to check the distance and visibility relative to the camera. In addition, it was very impractical for players to use, as it was highly ‘automated’ and offered very little control.
Version 1#
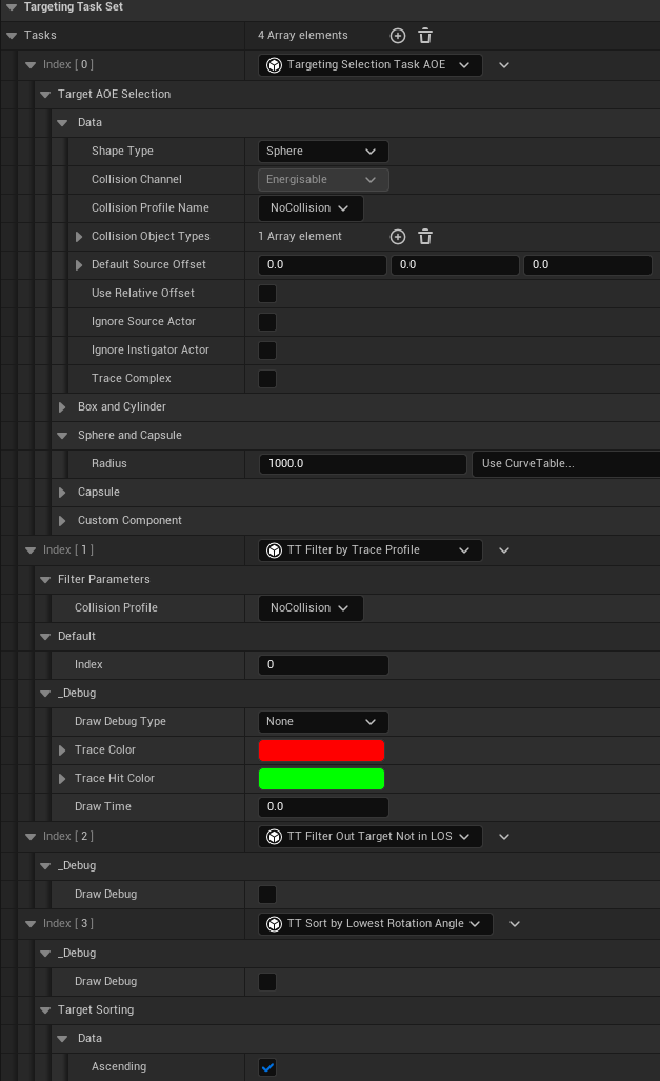
The second version used an official Unreal Engine plugin: Targeting System. It is a generic and modular system for building a targeting system. It is a very simple plugin that allows you to target in three steps: target selection, target sorting, and target filtering. Each step is configured throughout a TargetingTasks. Some are already provided by the plugin, but you can create your own Tasks according to your needs.
The algorithm is based on that of version 0, but I have created custom TargetingTasks.
Algorithm
- Select targets using a collision sphere attached to the player.
- Filter targets using a collision profile.
- Remove targets that are out of the player’s view.
- Sort the remaining target array by calculating which targets are closest to the centre of the screen (camera).
The algorithm was better optimised than in version 0 and worked a little better. It was also much easier to debug. However, it still suffered from certain issues, notably the difficulty for the player to control what they wanted to target, the same with V0.
Version 2#
Version 2 is much simpler than the first two.
- A targeting request is executed every frame.
- A SphereTrace is sent forward, starting from the player’s camera. Only elements that ‘block’ the ‘Targeting’ collision channel are selected.
- A second filter (created by me) allows filtering by ‘collision type’; in this case, only Energisable objects can be targeted.
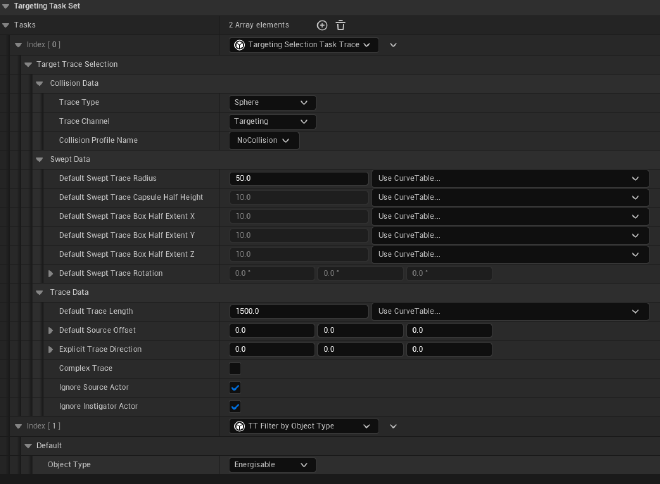
Targeting System V2 filters
This gives the player complete control over what they are aiming at, and it is the version that worked best during playtesting.
Interaction System#
The interaction system allows the player to interact with game elements generically (talk to an NPC, pick up an object, etc.).
- Player is equipped with a component that manages triggers and interactions with game objects.
- Each interactive element in the game has a component that communicates with the player’s interaction component.
- Interactable elements must implement the Interactable interface.
- The system allows for modularity; simply implement the ‘Interact’ function in the Blueprint of the interactable object and choose what you want to do with it (for an NPC, you can talk to them; for an object, you can pick it up).
- Interactable objects are detected using Unreal’s collision layers to improve performance so that the TriggerSphere detects ONLY interactable objects.
Crafting and Inventory#
The inventory allows you to store items that can be collected from the world, as well as items that the player has crafted. It is divided into two parts: the toolbelt stores craftable items, and the ingredients section stores crafting ingredients or quest items.
- The inventory is an ActorComponent attached to the Player Blueprint.
- A designer can add items to the inventory directly in the engine so that the player is equipped with them at the start of the game.
- They can also configure which crafts are available to the player (or not). They can check a box to block crafting at the start, which can be dynamically unlocked later in the game flow as needed.
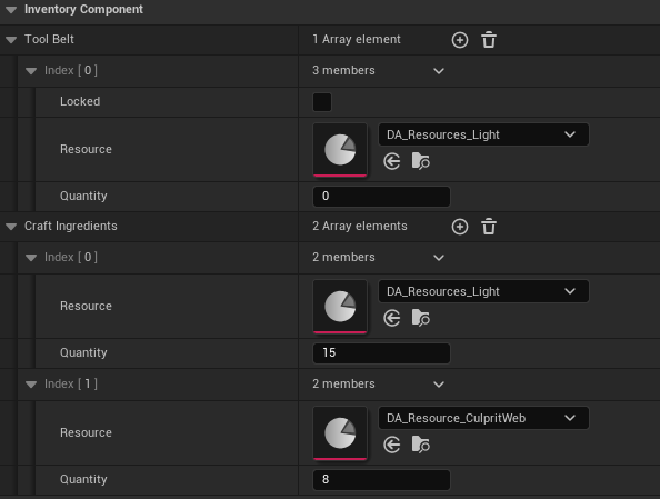
Default Item stored in inventory - The system was converted to C++ because it required extensive array manipulation and an algorithm that is quite difficult to implement in Blueprint (making the graph difficult to read). Even though the system itself is not very complex.
- Uses Delegates/Events to signal inventory updates, so that other game systems know if changes have been made to the inventory (particularly the UI).
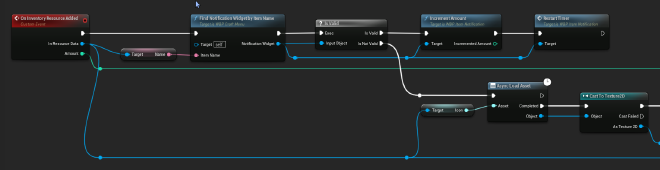
Example of subscribing to the ‘OnInventoryResourceAdded’ event, which displays a notification on the player’s screen - Items and crafting objects are all described by a DataAsset type asset.
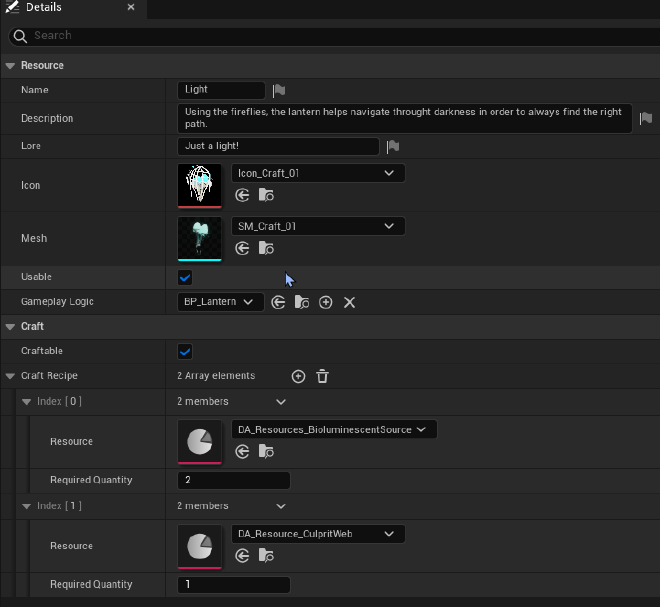
DataAsset representing a light, which is also craftable.
UI Programming#
The UI system has undergone significant changes throughout the project, because we made the transition from standard UMG to UMG with the CommonUI plugin to more easily handle controllers.
Root Widget Blueprint#
- UI elements displayed on the screen are all attached to a layer stack, categorised by GameplayTags. These stacks are CommonUI widgets.
- Stacks are added to a Root widget, which exists throughout the game’s lifetime.
- Stacks must be registered in advance with the corresponding GameplayTags.


This system automatically manages the ‘go back’ feature. Going back in a menu simply involves removing an item from the stack.
UI Manager#
- A UI manager (singleton, inheriting from the AHUD class) is used to store functions useful for displaying UIs.
- It contains functions for pushing widgets onto a stack using its GameplayTag. You can also pop a widget from a stack.
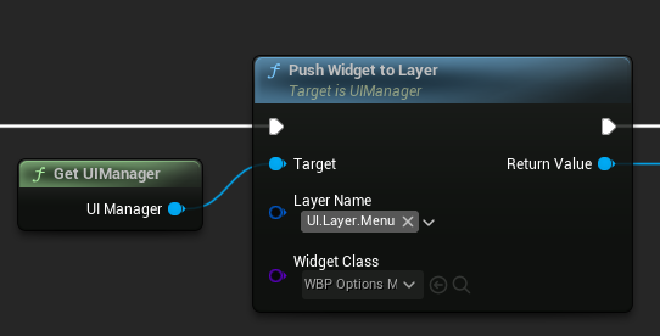
The system was complex to implement, mainly due to the lack of documentation on CommonUI. However, CommonUI did make it easier to navigate with the controller. But in hindsight, I would have been better off implementing my own system, as understanding CommonUI with the sparse documentation provided by Epic was challenging and caused me to waste just as much time, if not more.
Fact System#
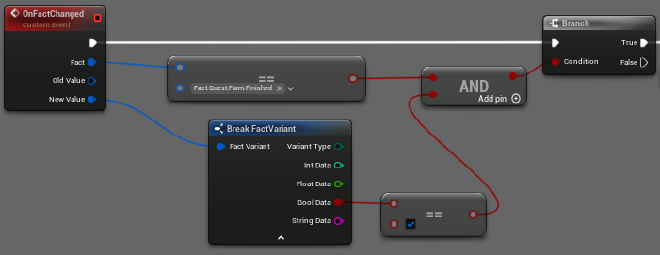
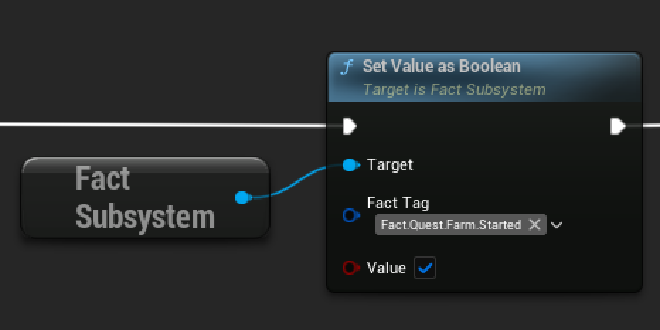
Facts are global variables (Boolean, integer, float, or string) implemented via the GameplayTags system. They are used to track the state of the world, trigger events, and manage progression (e.g., completed quests, dialogue conditions).
Facts can be compared against each other, and designers can easily create conditions in the editor for dialogues, for example.
Production#
Project Management#
I took care of the project manager role for most of the project and spent a good part of my time doing project management rather than programming, particularly at the beginning of each academic term.
Some of my responsibilities included:
- Extensive creation of documentation on project management for group members to refer to in case of doubt.
- At the beginning of M2, I wrote theoretical documentation on project management: Project Management Guide
- I also spent a lot of time learning about project management, or video game project management, to try to bring positive resources to the team. Even if it didn’t always work out, some things were useful.
- Setting up the software and tools needed for collaboration, such as a shared Google Drive, creating deliverables (such as the production report), managing the knowledge base, and managing task management software.
- Created a timesheet tool (in Notion) and updated it based on team requests
The project followed an Agile approach, with Scrum as its base, but with a few modifications due to the unique context of it being a school project.
Meeting organisation#
- Organised weekly meetings and their content, including Sprint Review, Sprint planning, Sprint Retrospective and all other necessary meetings.
- Organised meetings amid school constraints, which required a bit of energy
Rules formalisation and guidelines#
- Drafted and formalised a documentation concerning the team’s operating rules: Operating rules
- Drafted and formalised a documentation that outlines the roles and responsibilities of team members: Roles and responsibilities
Task Management#
- Created a Notion dashboard with everything needed by the team to manage tasks and the project as a whole
- Created and regularly maintained the team’ Notion, including task management and facilitating access to information for team members.
- Some form of ‘HR’ work at the end of first year, to try to resolve internal team issues
- Creation of guidelines and rules for task management, how to write them, etc.
Authors#
I am only one brick of the people behind this project. Our team is composed of various people and disciplines. We even gave a name to our team, the Sad Spoon!
Sad Spoon Team
- Adrien Dudon: Producer, Programmer
- Damian Lallement: Programmer, Technical Artist
- Elise Houart: Game Artist
- Giulia Storino: UI/UX Designer, Narrative Designer
- Ines Siméon: Game Director (Helped production too), Game Artist, Characters Artist
- Luna Halloin: Marketing Specialist
- Romain Rittier: Game Artist, VFX Artist
- Sébastien Villers: Game Designer, Sound Designer, Animator
- Wesley Brutus: Game Designer, Sound Designer